Thursday, May 8, 2014
Jouby
I am in the process of starting to sell again. I decided to come up with a new name, Jouby. Cute I think. It is a combo of my two little sweets. I plan to make teeny pants, cloth diapers, dresses and quilts of course. We will see how it goes. The process is slow at the moment, but fun to think about possibilities. I registered my business and name so I am legal. I completed the paperwork and record keeping so my business is fully compliant and meets CSPC guidelines for selling products for children. If you haven't read up on the newer guidelines then please feel free to do so. The process is not too complicated and it feels good to have the business compliant. If you would like to receive updates on Jouby then please follow me on my Facebook page. I am still going to blog under Natural Violet. Here are the quick links to all the fun stuff for Jouby.
Jouby Facebook Page
Jouby Hyena Cart
Jouby Etsy Shop
Happy Sewing!
Friday, April 18, 2014
Homemade soy milk, soy yogurt and okara lemon scones
I bought a soy milk maker finally. Very exciting news. It is a Soyajoy G4 and it is fabulous. It not only makes soy milk but also hemp, almond and rice milk. I bought it a few weeks ago and I have made just about every variety of milk so far. The Fat Free Vegan blog has a post on homemade soy milk and also for making tofu. She suggests adding a few tablespoons of oats along with salt to reduce the bean taste when making homemade soy milk. I haven't made tofu yet but it is on my list.
I do make yogurt now though using all the wonderful homemade nondairy milk varieties. The recipe is based on the one from the Artisan Vegan Cheese book. I use a nondairy yogurt starter by Belle+Bella. I start by pouring hot water in two quart mason jars along with the lids. I then add 1 teaspoon of agar and 2 tablespoons of organic corn starch to a saucier pan along with a half a cup of water. Bring to a boil and simmer for about 10 minutes until the mixture is thick. Add this mixture to a blender along with 2 cups of nondairy milk and 2/3 cup of soaked cashews. Add this mixture to a sauce pan along with an additional 1 1/2 cups of nondairy milk. Using a thermometer, bring the mixture to about 105 F. Turn of the heat and check the temperature again. If it is over 112 F then let it cool a bit before adding the starter. If not then add the starter and pour the mixture into two quart mason jars. Cover with a warm blanket and let it sit for about 24 hours. Put it in the fridge and enjoy.
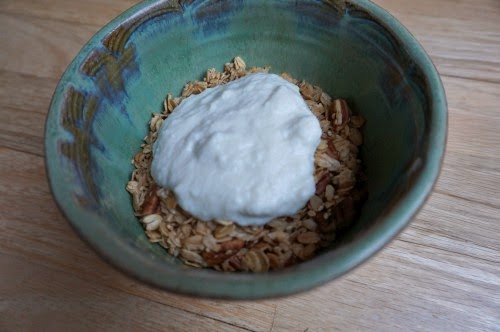
The interesting thing about making all the of the nondairy milks is I am left with quite a bit of pulp. Since I make a lot of soy milk it is typically okara. I have a composter in the back yard so that is definitely an option but I also like to bake a lot so I figure why not add it to scones. Here is my recipe for okara scones. It also works great with almond pulp from making almond milk which by the way tastes fantastic and is so much better than what I used to buy at the store.
Okara Lemon Scones
2 cups of okara or almond pulp
1/4 cup of fresh squeezed lemon juice
zest of one or two lemons
1/4 cup of maple syrup, agave or brown rice syrup
1/2 cup of nondairy milk
1 tablespoon of chia seeds, hemp seeds or ground flax
1/4 cup of canola oil or nut butter
1 teaspoon of vanilla
1 cup of whole grain spelt flour
1 cup of oat flour
1 cup of white whole wheat flour
1 tablespoon of baking powder
1/2 teaspoon of salt
Add the wet ingredients to a bowl and mix well. Add the dry ingredients and mix again but don't over mix. Using a 2 inch cookie scoop place the dough on a oiled cookie sheet or use a silpat. Bake at 400 F for 12-14 minutes until the edges are golden brown.
Wednesday, March 12, 2014
Hybrid one size fitted diaper with tutorial
Hybrid fitted diapers are very popular these days and fairly easy to make yourself. It is basically a fitted diaper with a layer of water resistant polyester fleece. An explanation of a hybrid diaper is in the nighttime one size hybrid diaper post. This diaper is suitable for daytime use and does not require an additional cover as long as it is not used for long periods of time. So that means the really cute prints on the diapers can be out in open view for all to admire.
The pattern I used is the Rocket Bottoms One Size Diaper. The pattern includes fold over rise snaps to make it one size. I added a front snap rise adjustment instead. I like both methods, but I use less snaps for the front placing rise adjustment. I used my own contour soaker pattern, but any design is great. Here is how to make the diaper.
1. For the diaper layers use woven cotton print for the outer layer, polyester fleece for the hidden layer and hemp/organic cotton fleece for the inside layer. Mark the placement of the snaps on the outer layer and add the front sockets prior to assembly to make them hidden. Mark the placement of the elastic to the outer layer. This is optional but you can add an additional layer of polyester fleece in the wet zone and sew it to the inside hemp fleece layer. Mark and add the snap in soaker sockets to the hemp fleece layer.
2. Cut the layers for the snap in soaker. Use 6 layers of hemp fleece and one layer of cotton velour for the top. Add the stud snaps for the snap in soaker to the bottom two layers. Cut two 6.5 inch pieces and one 5 inch piece of 3/8 inch braided elastic for the legs and back.
3. Sew the outer woven fabric with the polyester fleece and the hemp fleece inner fabric together with wrong side facing outwards. Leave a small gap at the top of the diaper to turn. Sew on the ends only of the elastic to the markings on the legs and back.
4. Turn the diaper right side out. Stitch around the entire diaper closing the open edge and making sure to not catch the leg and back elastic. For the legs and back, stitch a half inch casing making sure to not catch the elastic in the sewing. Add the wing snaps to the outside of the diaper.
5. To make the petal soaker, first serge the three bottom layers together with the snaps on the bottom. Serge the top three layers together with the cotton velour on top. Sew the two petal pieces together at the top corners. Diaper is all done!
Here is the inside of the diaper with the snap in soaker.
Tuesday, February 18, 2014
Lavender and lemon whipped body butter
Here is another lovely body care recipe. I make lotion bars on a regular basis and use them as my primary moisturizer. I love the bars so much that I no longer use any store bought lotions. I have said this before but making your own body care products is such a treat. I am so excited I found a few recipes for whipped body butter. It is similar to lotion bars except you leave out the wax and whip the oils with a mixer. Here is what I added to mine but there are several variations online. The texture is amazing and it is fairly simple to make.
Lavender and lemon whipped body butter
1/4 cup organic olive oil
1/4 cup organic coconut oil
1/2 cup organic cocoa butter
30 drops lavender oil
10 drops lemon oil
Melt the oils together using a hot water bath on the stove. Place the oils in the fridge for an hour. Whip the oils using a mixer to a frosting consistancy. Add the essential oils and blend. Treat your skin.
Saturday, February 8, 2014
First birthday for little sweets
So my little sweetie had her first birthday on February 8th. The year has really gone by so fast. I often talk about how fast the time goes by and I find this to be especially true with my second little sweetie. We had a grand party for little sweets though and my sister along with her family was able to make it up from NC. The theme for the party was Planting a Rainbow by Lois Ehlert. It was snowing outside but we were surrounded with flowers inside. Here are few pictures from the celebration.
Saturday, February 1, 2014
KCW Day 5 and 6 - Flutter sleeve dress and baby pants
For KCW Day 5 and 6, I made a really sweet little flutter sleeve dress and matching pants for R. The pattern for the dress is from Sew Chic Kids. I received the book for Christmas and I love all of the patterns. The flutter sleeve dress is style K. I made the size 2 and it is generous sized for R, but I figure she can wear it over the summer and maybe into next winter also with the pants. The material is from a cotton night gown I found at Goodwill. I also made another pair of Monster Bunz pants to go under the dress. The pants are made from sleeves of a knit shirt from Goodwill that I have been saving for a few years. I always planned to make a pair of pants for J but never got around to it so now I am using them for R. The charcoal lycra knit fabric is from Fashion Fabric Club. They had an awesome sale on knits a few weeks ago. The actually have free shipping this week so I am sure I am going to order more good stuff for sewing.
Photo bomb courtesy of little sweets. She crawled right over the pants and ground them into the wood floor. It is no wonder I rarely get a good photo to put on the blog. Oh well, I am sure it would help also if I had a good camera.
Thursday, January 30, 2014
KCW Day 3 and 4 - Hemp fleece baby pants and envelope tee with matching shoes
For day three and four of Kids Clothing Week I made another comfy set of baby pants with a matching envelope tee. The green fabric is the hemp and organic cotton fleece that I use to make the diapers. The gray fabric is a cotton rib knit that I purchased at Fabric.com. I used the same patterns as for KCW Day one and two, but I made the smaller size baby pants that fit from 3 months to 1 year. I would say the sizing for the pants is spot on since little sweets will be a year soon. Yikes! I am definitely in denial about that part.
I also made a pair of matching shoes from the green hemp fleece with a faux suede bottom. The faux suede is from Fabric.com again. I love ordering from there. The shoe pattern is the Cloth Shoe Pattern from Stardust Shoes. I used this pattern for J also when he was a baby.
Monday, January 27, 2014
Quilted duvet cover
In addition to KWC sewing, I managed a little selfish sewing this weekend. I made a quilted cover for my duvet. When I was pregnant with R I went through a big nesting phase at the end where I decided I was going to redo all of the bedroom linens. I did manage to make pillow cases before she was born which by the way are a real treat. I don't think I will ever want regular pillow cases again. I also made pillow cases and a duvet cover for J's room. I wound up placing the snaps on the wrong way when I tried to finish it up when R was just a newborn so after that point I gave up for a while on decorating. I am back to it and I finally fixed the snaps. His room looks awesome almost a year later. I also made a duvet cover for my room. I didn't use a particular pattern. I kept the design simple and added a bunch of color cotton fabrics. I bought all of the fabrics for the covers and pillow cases on Fabric.com. I love buying fabrics there. The customer service is awesome and the prices are great. I love the selection also. So here are a few photos of my decorating attempts. I am really happy with how everything turned out. I need to take a better photo of J's room. He decided to be a part of the photos of my room. Little did I know he was just waiting to jump on the bed. Well, it looked nice for a few minutes anyway.
KCW Day 1 and 2 - Comfy baby pants and envelope tee
It is KCW or Kids Clothing Week. I made a cute and comfy knit outfit for little sweets. I used the Monster Bunz Pattern for the pants. I made the large size without the circle bum. I am very excited about this pattern. It is so cushy and perfect for a little toddler. The size range is awesome also. The large fits from about 1-3 since the cuffs and waistband can be extended. It is pretty roomy on R now and super easy to get on and off for diaper changes. She also fits into the medium size which ranges from about 3 months to 1 year. The fabric for the pants is from a recycled pair of purple sweat pants I found at Goodwill. There is enough fabric to make two pants actually so very nice.
The envelope tee pattern is from one of my favorite books Growing Up Sew Liberated. I used the book to make the fabulous teepee for J's Christmas present. Well, the book also has really comfy clothing patterns. The envelope tee was easy to put together. I made the 12-18 months size and it fits her well though the sleeves are little long. The material is a cotton knit striped polo shirt from Goodwill. I also used this material to make the cuffs and waistband for the baby pants. She looks really cute in her new outfit. I plan to make a cute dress or pinafore to go with outfit. I received the Girls Style Book for Christmas and I can't wait to try out the patterns.
Thursday, January 23, 2014
Nighttime one size hybrid fitted diaper
I decided to make a special nighttime diaper for R. My inspiration is the tucked in all night diapers from Bagshot Row Cloth. I saw a link to the diapers on one of the cloth diaper facebook pages I follow and I was really intrigued by the idea of using poly fleece on the outside. I did a little research and if you get the right type of poly fleece then you can make an awesome hybrid diaper. How do you know if you have the right type of fleece? That is a little tricky since there are so many types of poly fleece available. The Windpro fleece from Malden Mills is the gold standard for making hybrid diapers but other types of fleece like blizzard or anti-pill will work well also. If you are not sure then you can add water to the top layer of the poly fleece and press on it. If the water goes through to the other side easily then it won't work well on the outside.
What is a hybrid diaper exactly? It is a fitted diaper that has an extra layer of water resistant poly fleece. For daytime use the poly fleece is hidden and placed next to the outside layer. This provides a water resistant layer that repels moisture back into the soaker layers of the diaper and therefore provides some wetness protection without having a separate cover. No separate cover? That's right. It means you can use all of the cute prints for the outside of the diaper and still be able to see them. Brilliant! The daytime hybrid diapers are not as water resistant as compared to a regular fitted with a cover or so I have seen. I haven't tried one yet but I plan to make one soon.
Back to making a nighttime hybrid diaper. If you place the poly fleece on the outside of the diaper and add a few extra layers to the wet zone along with a lot of hemp fleece then you can make a super duper nighttime diaper. I made the diaper shown using the Rocket Bottom one size diaper pattern and it has a fold down rise. The outside is 200 weight anti-pill fleece from a recycled Land's End fleece sweater. I tested the poly fleece prior to making the diaper and it seemed very water resistant. I added two additional layers of poly fleece in the wet zone. The diaper has a hidden layer of hemp fleece and a bamboo velour liner. The insert is snap in and petal style. The top petal layer is bamboo velour and three layers o f hemp fleece. The bottom petal is four layers of hemp fleece. I made an additional lay in insert with four layers of hemp fleece to place under the snap in insert. So that makes 14 layers of absorbent fabric.
The diaper is fairly fluffy as you imagine but it works like a charm. When J was younger than 8 months or so I could get away with using a regular daytime diaper for nighttime use. Once he got a little older I found the regular diapers were not adequate for nighttime use. I have been adding extra hemp fleece inserts to R's regular diapers since she is 11 months and that works fine. I don't have wet sheets at the end of the night but I do get a little moisture to the outside. The diaper is totally saturated also so I wanted to make a separate diaper for nighttime use with a high absorbancy. I am really happy with the nighttime diaper so far. R is really comfortable in the new diaper too and I don't have to add a separate cover. I took it off her this morning and it wasn't totally soaked. I am impressed since she is a heavy nighttime wetter. The addition of the poly fleece helps the diaper work better by distributing the moisture throughout the insert layers. So I plan to make a few more and look for the Windpro fleece. While I am it I will make a few daytime hybrid diapers so I can enjoy all the fun fabrics on the outside.
Sunday, January 19, 2014
One size all in two diapers
I find the more I use cloth diapers the closer I get to diaper nirvana or finding that sweet spot where I love the diapers. It takes a lot of trial and error to make diapers and to find the right combination but I feel I am getting close. I really like the AI2 diapers for when I am out and about. They are easy to take off and store in a wet bag. They are also fairly simple to put on a wiggly baby. I say fairly simple because as you know nothing is really easy to put on a wiggly baby. R is definitely on the go these days. She is not walking yet, but she crawls really well and can stand on her own for small periods of time. It is exciting to see her learn all these new skills.
Back to the NykiBaby pattern. It is supposed to fit up to 40 pounds but it is already getting a little snug on R on the largest setting and she is around 21 pounds. She is average so I don't think the size goes up that high. From my experience with using it on J and now on R, I would guess closer to 30 pounds depending upon body type. I also measured the pattern next to the Rocket Bottom one I used for the bunny diaper and it is medium size as compared to that pattern. Since it is getting snug and I really like the pattern, I decided to increase the size. I added an inch to the overall width and length. I also added an additional inch to the wing and increased the size for the smallest setting. The larger AI2 has a fun space pul outer, a hidden hemp fleece layer and bamboo velour liner. The insert is snap-in and has eight of layers as the smaller size. I will give the smaller AI2 size diapers to a friend in the next few months so it is good to start sewing now. The larger size should fit R until potty training.
A note on the hemp and organic cotton fleece. It is dyed a lovely green color. I bought it from Pickering Hemp since it was on closeout after the holidays. It is usually $8.75 a yard and I purchased it for $7.50 a yard which is great price for hemp fleece. Shipping was an additional $1.25 per yard but still a good deal. I haven't used hemp fleece in a while so it is really nice to have some again. I love the softness and drape. I made R a pair of awesome pants from the material and will post about it soon. For a little hint I made the pants from the new Monster Bunz pattern. Really cute if you are looking for a baby and toddler pants pattern.
Subscribe to:
Posts (Atom)
Natural Soap Making and Himalayan Salt Soaps
I have been making natural soaps and shampoo bars for a few years now. I started making soaps for the local Halo Salt Spa back in 2015. I...
-
Hello and welcome! After looking at the entry and exit pages for my blog I found this page is the one that most people view. I decided t...
-
Update: See my latest post on making a one size AI2 diaper . I started making newborn diapers for our little girl on the way. I ha...


